Saturday, April 6, 2013

Orly Lollipop

Orly Lollipop
This is a really stunning lilac pastel purple. It only needs two coats for full coverage. It's not streaky at all. The formula is really wonderful. You will get lots of compliments on this color. It is beautiful for spring!


Tuesday, March 26, 2013

OPI Don't Touch My Tutu & Easter Nail Art

 OPI Don't Touch My Tutu is the greatest sheer white jelly on the planet. It has a million uses. Looks great on it's own, perfect for french manicures, excellent base for nail stamping, etc. It's not streaky. It's amazing. I have not a single negative thing to say about this polish. Go buy it! It's an A+! I used three coats in the picture below.

OPI Don't Touch My Tutu


This is my take on easter nails. I didn't have any image plates that had bunnies, eggs, chicks, or other easter things. So I decided to stamp a pattern that might look a bit like a faberge egg. I love the way this turned out! Nail stamping can look very teenage or sleazy. It's very spring without being tacky. Très chic!


Wednesday, March 13, 2013

White & Copper Nail Art

I've said it before and I'll say it again, metallics are really great for nail stamping. For a while now I've been wanting to try Essie Penny Talk for nail stamping. I decided to try it over white. I figured it would really pop. To be honest, this manicure looks better in the pictures than it does in person. The copper looks too dark unless you are in really bright sunlight, as I am in the picture below. Oh well, it was worth a try!
Sally Hansen White On with Essie Penny Talk


Thursday, March 7, 2013

The Perfect French Manicure

It's taken me many attempts before I discovered how to do the perfect french manicure. There are many techniques, such as using tape as a guide or using a french manicure pen to draw on your tips. These work okay but the perfect french manicure is created using a konad image plate to stamp on the white tips.

One thing that bugs me about french manicures is the sheer nail color. It is so hard to find the perfect sheer color to apply over the entire nail. They're mostly too pink, sometimes too yellow, and never how I like them. Enter OPI Don't Touch My Tutu. This is the perfect sheer white jelly for a french manicure. I used two coats of OPI Don't Touch My Tutu in the pictures below. To complete my perfect french manicure look, I stamped on my tips using a konad plate. I did this twice on each nail to get a really opaque white, using Nails Inc. Floral Street.

The Perfect French Manicure


Sunday, March 3, 2013

OPI A Butterfly Moment

I've never really been into any of the OPI collections done by celebrities. They're pretty tacky. I even think all the colors in Mariah Carey's collection are tacky, with the exception of  A Butterfly Moment. This is a pinky, peachy, frosty, nude/tan with bunches of gold shimmer. It's quite unique. There aren't many other polishes out there that can be considered pink, peach, nude, and gold.  I think you can consider this a neutral. It's a lot more opaque than you would think. I only needed two coats for the picture below.
OPI A Butterfly Moment


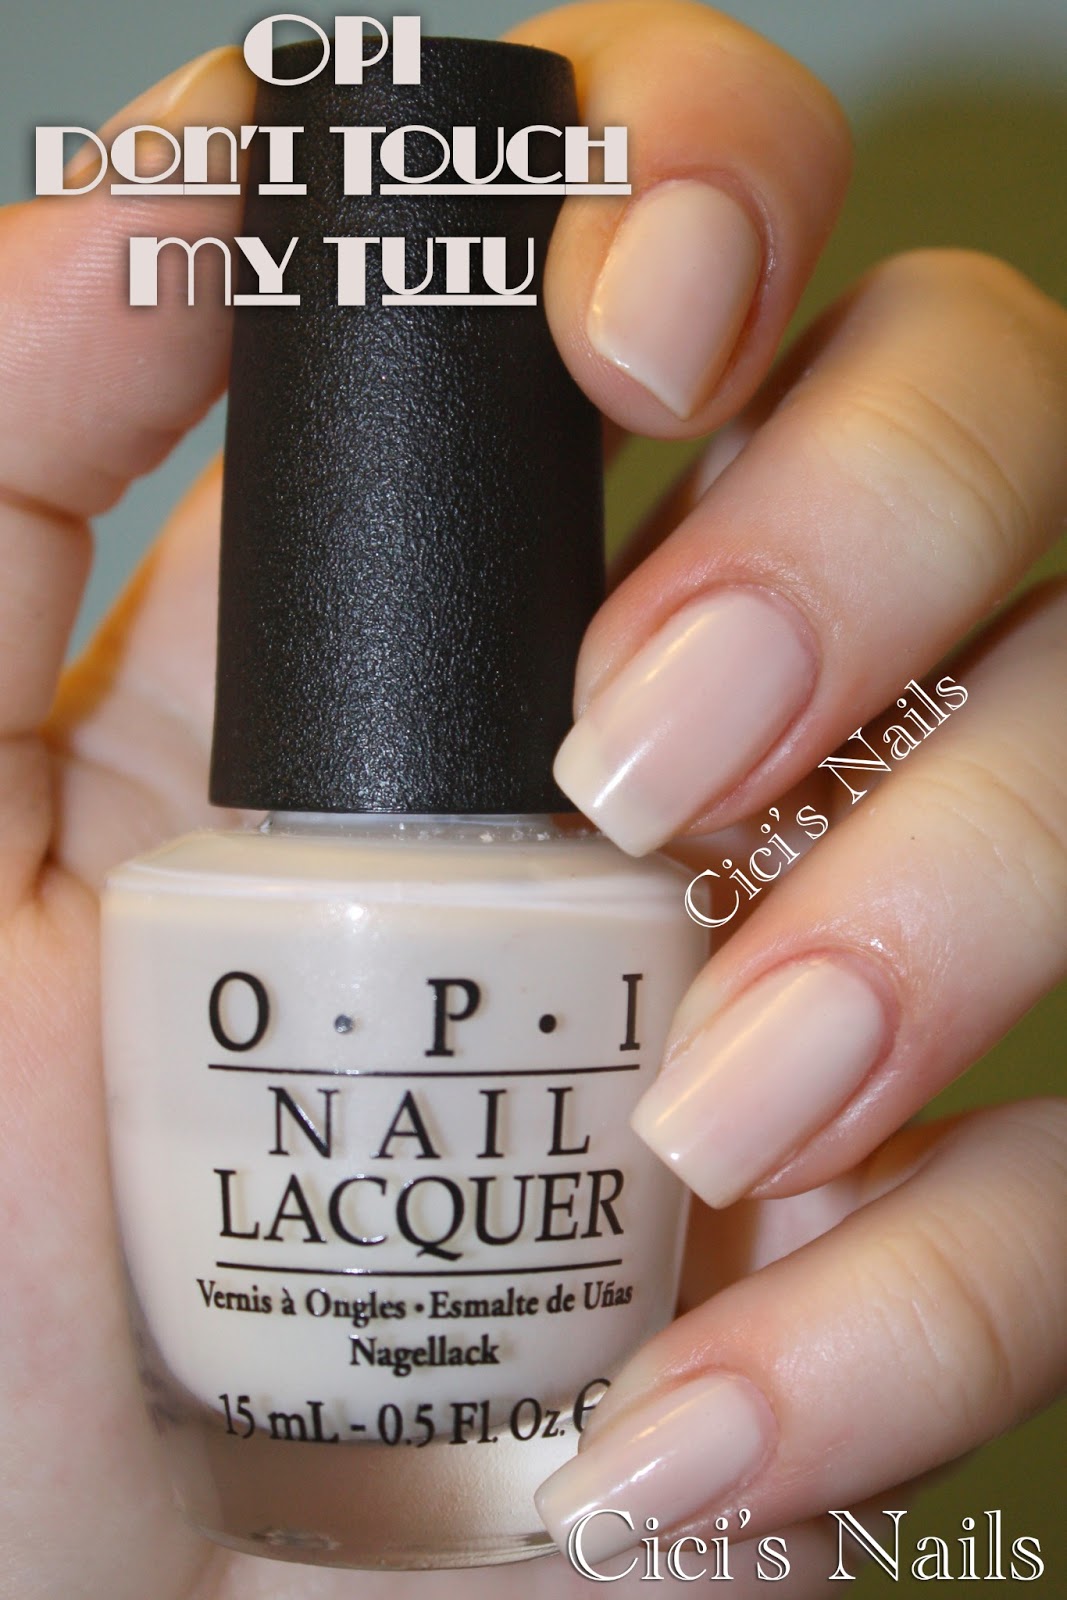
I give this color an A because it's universally flattering. This is a color for all ages, skin tones, etc. It does not get the + because I think some people might have trouble with streaking. For some reason, I find that using a top coat helps to get rid of any streaks. This would make a great little present for anyone you know because chances are they don't already have a color similar to this.

P.S. I feel like this polish should've been named after Mariah Carey's song Honey.


Friday, March 1, 2013

DIY White Iridescent Glitter Manicure

One of the problems of being both a college student and a nail polish addict is not being able to afford certain brands of nail polish. Chanel, Dior, YSL, Nars, Illamasqua, Deborah Lippmann, and countless more all prove to be too expensive for me. I don't mind it really. I haven't really found any colors from those brands that I am dying to have, with the exception of one. Deborah Lippmann Stairway to Heaven. Actually there are a lot of Deborah Lippmann polishes that I want but this one I am dying to get my hands on. This polish contains small, white iridescent glitter in both square and hex form in a clear base. I've heard this described as having multicolored glitter in it. No. It's iridescent, meaning the surface appears as various colors when viewed from different angles. Anyway, another thing I love about this polish is the name: Stairway to Heaven. Not only is it an absolutely epic song from one of my favorite bands, but the polish is as glowing and luminous as actual stairways to heaven. There's a feeling I get when I see them and I get that same feeling when I hear that name and see that polish. 

Okay so onto the whole reason I even created this post. I decided try a much cheaper alternative to buying Stairway to Heaven. It's really not at all as pretty as the real thing but it's still pretty cool. And I really love experimenting with do it yourself nail polish and manicures. It's fun to pretend you have your own nail polish brand.

It was really hard to to capture just how sparkly the glitter is. It's much more beautiful in person than in the pictures. I think that says a lot because it is still quite lovely in the pictures. 

DIY White Iridescent Glitter Manicure

DIY White Iridescent Glitter Manicure
How to achieve this look:

1. Apply Orly Bonder (or your favorite base coat).
2. Apply one coat of OPI Don't Touch My Tutu.
3. Apply another coat of Don't Touch My Tutu, sprinkle glitter over nail immediately after polish is applied (meaning don't apply the second coat to all of you nails and then sprinkle the glitter. Do one nail at a time with both the polish and the glitter. This is how you get the glitter to stick on properly).
4. Apply a top coat if desired (I did not in the pictures above).

I only needed to spend an extra $1.25 to complete this look. All I needed was the glitter since I had all of the other stuff I used on hand. That beats $19 by a landslide. I hope this inspires you to try your own glitter manicures. You can do this with any color glitter!


L'Oreal Paparazzi Pleaser

This is a dark grape purple creme polish. If you search for this color on google images, there are quite a few pictures that make it look much lighter than it really is. My pictures very accurately represent the color. To me, it is a dark color, others might see it as a medium purple. In my opinion, it's a really unique shade. It's a bit muted, which I like. It's kinda streaky but you can't tell at all in the photos. In certain lights, some spots look a bit more sheer than others. I used two coats in the pictures below.

L'Oreal Paparazzi Pleaser


I love nail stamping, but I don't always get it right. You have to use a reaaaaalllllly opaque color for it to look good, especially if you are stamping a light color over a dark polish. Today I realized that Essie Nothing Else Metals would be perfect for nail stamping. I decided to try a cute little flower pattern. It came out fantastic. I love the combination of the two purples.


I give Paparazzi Pleaser a B+ because the formula isn't the greatest. You might need three coats for it to be completely opaque. Still, it's really not noticeable and I am just nit picking. The reason I don't give this polish an A is because I am just not wowed by it.


Tuesday, February 26, 2013

Cover Girl Pink-finity

Cover Girl Pink-finity might be an Essie Muchi, Muchi dupe. The color is so similar but the formula is very different. Pink-finity has an ever so slightly cooler tone. It is more opaque than Muchi, Muchi and kinda streaky. However, the color is so beautiful that it doesn't matter that it's a little streaky. You just have to be extra careful when applying it. I applied two coats to get opaque coverage.


CoverGirl Pink-finity


I got a little inspired tonight after I did my nails with Cover Girl Pink-finity. I was going through my nail plates and found a cute little flower design. It inspired me to do a little spring design.


The only problem I see with this color is that it's a bit streaky. Everything else about it is perfect.


Monday, February 25, 2013

Revlon Popular

I got a bunch of new nail polish for my birthday a few days ago, which means I'll have lots of new swatches for you. The color that jumped out at me the most was Revlon Popular. It probably stood out because of the glitter. I can't get enough glitter, like any typical girly girl.

Moving on, Revlon Popular is a light, soft dusty rose jelly with light silver micro and hex glitter. This color is gorgeous. It's probably the classiest glitter nail polish I've ever seen because it's very subtle. I loooooooove the formula. It's the perfect amount of sheer, good jellies are like that. I didn't have problems with streaking either. I used two coats for the pictures below. One coat would be so nice for french manicures and I will definitely be doing one soon.

Revlon Popular

Revlon Popular


I give this an A and not an A+ because it's a little thick, which gives it a long drying time. Other than that I really adore this polish.


Saturday, February 16, 2013

Silver Glitter French Manicure

Hello All!

Today I have for you a very complicated silver glitter french manicure.

It's complicated in that there are a lot of steps to achieve this look. It is quite worth it if you have a special occasion to go to and don't want to pay to get your nails done. I actually have never gotten my nails done professionally. My obsession with nail polish began when I was a young teenager. I didn't have money to get my nails done so I taught myself.

This manicure involves many of the steps used in water marbling. Never heard of water marbling? Heard of it but don't know how to do it? Watch this video! The first time I tried water marbling I watched a different video with horrible instructions. It was a major fail for me. I was really upset so I watched a ton of youtube videos on how to do it properly and that's when I came across Colette's (SimpleLittlePleasures) video. She gives you impecable instructions and amazing tips. Why did my first water marble attempt result in a disaster? I used crappy, unfiltered, salty, well water from the faucet in my laundry room. Colette recommends using filtered (Brita works great) or bottled, room temperature water. I find that lukewarm water also works well.

Ok. Now you are good and ready to learn the steps to achieving this look.

Silver Glitter French Manicure Steps:

1. Apply Orly Bonder Rubberized Base Coat (or your favorite base coat).

2. This is where your water marbling knowledge will come in handy. I call this the water technique. Please note that I used OPI Kyoto Pearl for this step. Fill a small cup with lukewarm water. Place ONLY ONE drop of nail polish into the cup. Dip your nails into the water. You'll have a very sheer, perfectly even, thin coat of color on your nails. LET YOUR NAILS DRY COMPLETELY BEFORE REPEATING & ADDING ANOTHER COAT. I repeated this step 4 times to achieve the color you see in my pictures. (I probably needed more coats than the average person because my nails are stained an orangey, pinky, weird, red color from wearing so much red & pink polish)

3. Next is the silver tips. I used Jordana 091 Silver. HOWEVER, I crushed and added the silver eyeshadow from my L'Oreal HiP Studio Secrets Professional Metallic Shadow Duo in Platinum 906. This just made the color more opaque and less sheer. I nail stamped the silver tips using my Konad French Manicure Plate. I had to stamp each nail twice to get opaque coverage.

4. Next is the fun part, the glitter! I used Essie Set In Stones to create a glitter gradient. After you dip your brush in the polish, wipe most of the polish off on the sides of the bottle opening so you have just a little bit of glitter on the brush. Apply it from the middle of the nail to the tip. There should be a small amount of glitter on your nails. For the next step, dip the brush in the polish as you normally would. Dot/brush the glitter polish onto the silver tips. You may allow the glitter to go just below the silver tip. Make sure you smooth out the polish with your brush so your tips don't have thick globs of polish that will just smudge and never dry. It should look like the glitter is falling and/or gradually fading from your tips.

5. Finally, apply Orly Sec 'N Dry Top Coat (or your favorite top coat).


Please excuse the terrible cut on my middle finger, I tried to blur it out on iphoto but there's only so much you can do.


Reviews of the colors I used for my silver glitter french manicure:

OPI Kyoto Pearl
This is a sheer, frosted, silvery white. As I noted earlier, I used 4 coats to apply this polish using the water technique. When applying it with a brush, I like to use two coats but it's still a little sheer. If you want it opaque, three would do. I like to use it sometimes for a french manicure instead of your typical sheer white jelly. Don't get me wrong, I love a classic french manicure but this will jazz it up a bit. I give it a B because it is streaky (which is why I use the water technique to apply it for french manicures). Also, I'm not big on wearing opaque white on your nails but I like this one because it's frosted.


Jordana 091 Silver
This is a very sheer, somewhat metallic, light silver. As I stated earlier, I added crushed up silver eyeshadow to make this more opaque. Without the added eyeshadow, I think this would take 4 or more coats to get opaque coverage. It's certainly not the most metallic silver polish out there. I do not have the Essie Mirror Metallics silver shade (No Place Like Chrome) but if I did I would've used it because it is much more metallic. I give this polish a C+ because it's very, very sheer. It also chips easily when worn without a good base coat. The only reason I don't give it a lower rating is because it's $1. It's price makes it worth buying for me because I hardly wear silver polish (doesn't go with my skin tone. I'm an autumn, not a winter).


Essie Set In Stones
I love this polish. I'm kinda obsessed with glitter gradients, whether they fade from the cuticles or the tips, I'm a big fan. This formula isn't too thick. I like the amount of glitter that is in it, not too much and not too little. I wish Essie had a gold version of this. I give this an A- only because in some lights the glitter can look really dark. That really bothers me for some reason. Other than that it's amazing.


Friday, February 15, 2013

Essie Pink Diamond

Happy Valentine's Day! Whether you are in or out of love, I do hope you can see the love that is all around you.

I decided to wear Essie Pink Diamond today. Though I have a nice nail stamping plate with hearts, I just didn't feel like stamping over this color. Essie describes this color as a sparkling gemstone pink. It's a frosted baby pink pearl, a throwback to the 60's & 70's, as my ma says. It's quite sheer, 2 or 3 coats will do the trick. I am a big fan of Essie in general so it's hard for me to find anything wrong with Pink Diamond. It's a very pretty, classic color. I have taken a few photographs, so you can see the color in different lights.


I took this photo with my phone a few weeks ago. Photos from my phone tend to have a lot of green and yellow tones.


I gave this an A- because it's a bit sheer, a bit streaky, but just so pretty. I wouldn't recommend it over Muchi, Muchi but it's still a wonderful color to have in your collection.


Thursday, February 14, 2013

DIY Homemade Nail Polish

It's a dream of mine to start my own nail polish line. Since that is not going to happen anytime soon I can pretend. I took a clear $1 nail polish and added a few drops of various purple polishes that I own. Then I added 5 different purple glitters into it and voila! Easy homemade purple glitter topcoat nail polish.

The glitter polish would go nicely over any shade of purple but I chose a dark amethyst color. I applied two coats of my glitter topcoat over two coats of Sinful Let's Talk. This is another difficult color to photograph. It typically looks blue in photos but I've managed to get a pretty accurate shot of the color.


My homemade glitter topcoat in the bottle. Can you see the five different glitters I used?

I'm not going to give this a rating since it's obviously not available in stores, so therefore I cannot recommend it to you. I do however recommend you try to make your own nail polish!


Wednesday, February 13, 2013

Essie Muchi, Muchi

I have fallen in love with this polish! It's feminine, delicate, sophisticated, subtle yet chic...the list goes on. It's just the perfect shade of light pink. Essie describes it as a creamy, luscious pink with a kiss of mauve. That "kiss of mauve" gives the pink a cooler tone, which is probably why I love it so much. It's a fairly sheer color, but I only needed two coats. If you are not very experienced at painting your nails you'll need to be very careful so as to avoid streaking. You might want to try three coats as well. I had no problems with chipping or cracking. It actually lasts very long on my nails. Since I bought it (about 2 weeks ago) I've worn it four separate times. And I have so many ideas for nail stamping over it!.


Essie Muchi, Muchi


Essie Muchi, Muchi with Essie Beyond Cozy on my ring finger


Essie Muchi, Muchi with hearts stamped on my ring finger using Sally Hansen Bubblegum Pink


Essie Muchi, Muchi with Sally Hansen Bubblegum Pink on my ring finger. Stamped design also in Sally Hansen Bubblegum Pink.


I give this an A+. The formula is lovely, I only needed two coats despite it being on the sheer side. The color is unbelievably gorgeous and it's practically chip-resistant. This is one that every girl needs in her collection.